- Home
- /help centre
- /internet
- /NetComm NL20 CloudMesh Gateway Setup Guide
NetComm NL20 CloudMesh Gateway Setup Guide
Last Updated: Tuesday 15 Sept 2026
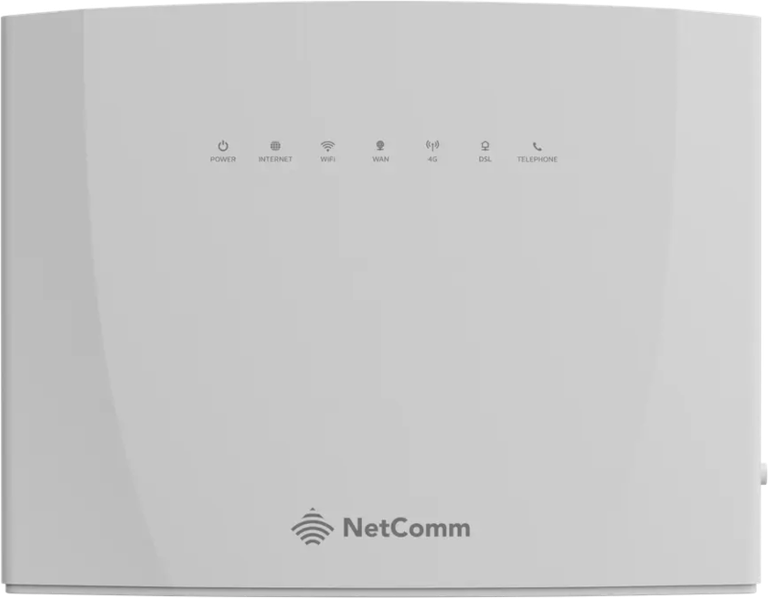
If you’ve purchased your NetComm CloudMesh NL20MESH from Aussie Broadband:
It should arrive preconfigured for your standard internet service and 4G backup. In most cases, you only need to connect the router and turn it on.
If you purchased the NetComm from another supplier:
Check its current firmware version before setting up.
Select your connection type
You will need to know your connection type to set up your device. Not sure? Check your connection type here.
Plug the ethernet cable into your NBN connection box. If you're unsure how to do this, visit our Onboarding Hub.
Next, plug the other end of the ethernet cable into the port labelled "WAN" on the back of your NetComm device.
Plug in the power cables for both your NetComm and connection box. Make sure all connections are secure, then switch both devices on.
Wait for 10-15 minutes for both devices to finish setting up, checking that all your connection box's lights are green or flashing amber where applicable.
Note: if the lights still don't look right, repeat these steps, then visit our Help Centre for troubleshooting.
You can also connect devices to any of your NetComm’s ‘Ethernet’ ports, or connect a VoIP handset to the 'Phone' port.
Connect a computer or phone to the NetComm’s Wi-Fi network using the details printed on the label on its base.
Note: your device may show “Connected, no internet” at this stage. This is normal.
Open an internet browser window, enter 192.168.20.1, and press Enter.
Sign in with the username ‘admin’. Your password will be listed on the sticker on the base of the NetComm.
Select Run Quick Start Wizard from the Quick Tasks bar at the top of the home page.
For Internet Service, select Ethernet WAN.
For Connection Type, select Dynamic IP.
Set 802.1P to -1 and VLAN Tag to -1.
Make sure 'Enable Mobile Broadband Backup' is ticked.
In the APN field, enter ‘connect’, then select Next.
Optional: change your router Login Username and Login Password.
Note: if you reset your router in the future, these will go back to the default on the base of the NetComm.
Select Next.
Optional: if you use an Aussie VoIP service, you’ll need to enter your VoIP settings now. Read our VoIP settings guide here.
Select Next.
Select the appropriate time zone for your region, then click Next.
Select Finish.
Connect a computer or phone to the NetComm’s Wi-Fi network using the details printed on the label on its base.
Note: Your device may show “Connected, no internet” at this stage. This is normal.Open a browser, enter 192.168.20.1, and press Enter.
Sign in with the username ‘admin’. Your password will be listed on the sticker on the base of the NetComm.
Select Internet from the menu on the left.
If the table contains existing connection profiles, select the Delete checkbox beside each profile, then select Delete.
Select Create New in the Internet Service Information window.
In the description, enter EWAN.
For Internet Service, select: Ethernet WAN
For Connection Type, select Dynamic IP.
Select More Options and change only the settings below:
802.1P Priority: -1
802.1Q VLAN ID: -1
NAT: Enabled
Firewall: Enabled
MTU Size: 1500
MSS Size: 1400
IP Protocol: IPv4/IPv6
DHCPv6 (IANA): Enabled
DHCPv6 (IAPD): Enabled
Select Apply.
Optional: If you use an Aussie VoIP service, you’ll need to enter your VoIP settings now. From the main menu, select Voice, select SIP Basic Setting, then enter your VoIP settings. Read our VoIP settings guide here.
Start by locating the phone wall socket in your house and insert your DSL cable, pushing it in until you hear a click.
On the back of your NetComm, plug the other end of the cable into the port labelled "DSL".
Connect the power cable from the wall to the NetComm, making sure all connections are secure, and turn the power on.
Wait 10-15 minutes for the NetComm to finish setting up, checking that the DSL light is green.
Note: If the lights still don't look right, repeat these steps, then visit our Help Centre for troubleshooting.
You can also connect devices to any of your NetComm’s ‘Ethernet’ ports, or connect a VoIP handset to the 'Phone' port.
Connect a computer or phone to the NetComm’s Wi-Fi network using the details printed on the label on its base.
Note: Your device may show “Connected, no internet” at this stage. This is normal.Open a browser, enter 192.168.20.1, and press Enter.
Sign in with the username ‘admin’. Your password will be listed on the sticker on the base of the NetComm.
Select Run Quick Start Wizard from the Quick Tasks bar at the top of the home page.
For Internet Service, select VDSL.
For Connection Type, select Dynamic IP.
Set 802.1P to -1 and VLAN Tag to -1.
Make sure Enable Mobile Broadband Backup is ticked.
Type the word ‘connect’ in the APN field, then select Next.
Optional: change your router Login Username and Login Password.
Note: If you reset your router in the future, these will go back to the default on the base of the NetComm.
Select Next.
Optional: if you use a VoIP service with Aussie Broadband, you’ll need to enter your VoIP settings now. Read our guide to setting up VoIP here.
Select Next.
Select the appropriate time zone for your region, then click Next then Finish.
Connect a computer or phone to the NetComm’s Wi-Fi network using the details printed on the label on its base.
Note: Your device may show “Connected, no internet” at this stage. This is normal.Open a browser, enter 192.168.20.1, and press Enter.
Sign in with the username ‘admin’. Your password will be listed on the sticker on the base of the NetComm.
Select Internet from the menu on the left.
If the table contains existing connection profiles, select the Delete checkbox beside each profile, then select Delete.
Select Create New in the Internet Service Information window, then enter the following:
Description: EWAN.
Internet Service: VDSL
Connection Type: Dynamic IP
Select More Options and only enter the settings below:
802.1P Priority: -1
802.1Q VLAN ID: -1
NAT: Enabled
Firewall: Enabled
MTU Size: 1500
MSS Size: 1400
IP Protocol: IPv4/IPv6
DHCPv6 (IANA): Enabled
DHCPv6 (IAPD): Enabled
Select Apply.
Optional: if you use a VoIP service with Aussie Broadband, you’ll need to enter your VoIP settings now. From the main menu, select Voice, select SIP Basic Setting, and enter your VoIP settings. Read our guide to setting up VoIP here.
Check your firmware
Connect a computer or phone to the NetComm’s Wi-Fi network using the details printed on the label on its base.
Open a browser, enter 192.168.20.1, and press Enter.
Sign in with the username ‘admin’. Your password will be listed on the sticker on the base of the NetComm.
Select Summary from the menu on the left to view the current firmware version.
The following firmware versions support Aussie plug-and-play setup:
NL20MESH.NC2.UR-R6B030.EN
NL20MESH.NC2.UR-R6B022.EN
If your NetComm isn’t connecting to the internet with plug-and-play, and your firmware doesn’t match the above, you can update your firmware.
Download the firmware file for your exact NetComm model from our Firmware page.
Connect a computer or phone to the NetComm’s Wi-Fi network using the details printed on the label on its base.
Open a browser, enter 192.168.20.1, and press Enter.
Sign in with the username ‘admin’. Your password will be listed on the sticker on the base of the NetComm.
Select Advanced in the left side menu.
Select Update Firmware.
Select the file you downloaded and wait for the update to complete and the NetComm to restart.
Factory reset your NetComm by holding a pin or toothpick in the reset hole for 10 seconds.
Important: A factory reset removes customised settings, including your Wi-Fi network name, Wi-Fi password, and login details. The default details are printed on the label on the base of the NetComm. Your Aussie Broadband 4G backup should automatically configure after a reset.
If you have Netcomm NS-02 satellites, click here to read our setup guide.
For more information on the NetComm NL20MESH, click here to read the official user guide.
If you have any questions or would like further assistance with setting up, feel free to contact our team via Live Chat, or by calling 1300 880 905, available 8am – midnight (AEST) every day (except Christmas and Good Friday).
Was this helpful?